


Decentralized finance, or DeFi, has come a long way over the years. It has completely changed the way we interact with money and has reduced the average person’s reliance on banks or brokers. Defi allows users to lend and borrow crypto, trade and earn interest directly through decentralized applications (or Dapps).
One of the most important concepts powering this revolution is crypto wallets like Metamask. If you’re new to Defi and wondering how to get started, here’s a step-by-step guide on everything you need to know about Metamask, from installation to making your first transaction.
Estimated reading time: 8 minutes
Table of contents
What is MetaMask and Why is it Important?
As mentioned earlier, MetaMask is a crypto wallet. It is available either as a browser extension or as a mobile app, and is therefore usable on any platform of your choosing. Think of Metamask and other crypto wallets as your personal interface to the blockchain. They enable you to store and manage your assets, or even to interact with Dapps on networks like Ethereum or Polygon if you like.
MetaMask removes the need for an intermediary when it comes to managing your crypto. You alone control your private keys. You have full access (and responsibility) for your funds. Moreso, whether you’re swapping tokens, staking coins, or joining a liquidity pool, MetaMask makes it all possible.
Getting Comfortable With Metamask
Now that we have what MetaMask is, and what it can do for you out of the way? How can you get started? Here’s a quick overview of how to get your hands dirty with this tool.
Step 1: Installing MetaMask
To get started with MetaMask, you first need to install it on your preferred device. Head over to the official website at https://metamask.io to download this tool (make sure to check the URL to avoid falling victim to malware or phishing scams). The website’s interface should look something like this:
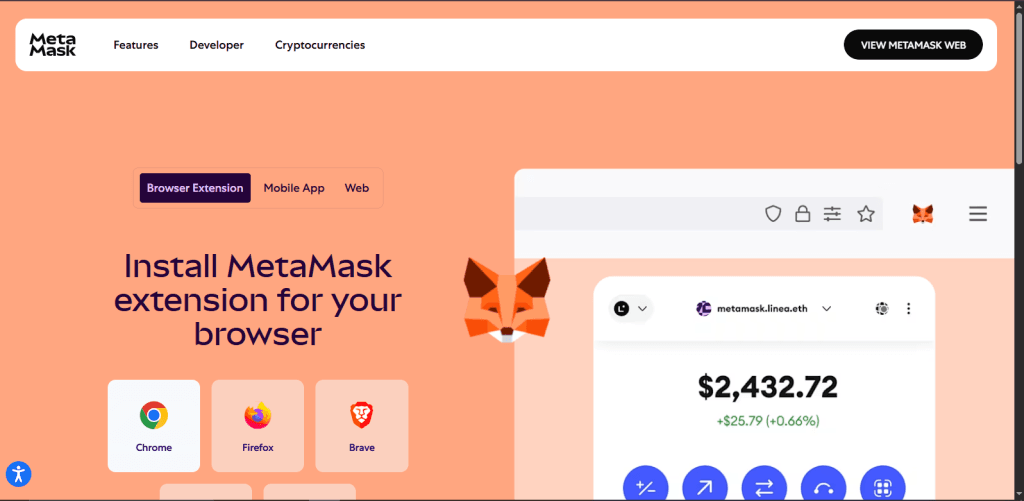
Remember that MetaMask is available for Chrome, Firefox, Brave, and Edge browsers, as well as iOS and Android devices. Decide which device you would like to install the tool on, and click on the corresponding platform. Once installed, you should see the MetaMask fox icon in your browser or app screen.
Step 2: Setting Up Your Wallet
MetaMask offers you two options. You can either create a new wallet or import an existing one.
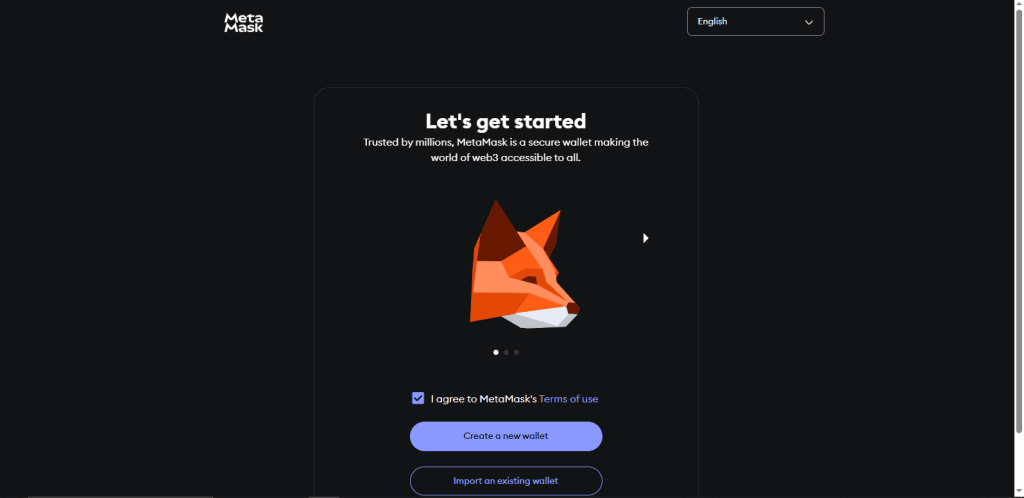
This guide assumes that you are a complete beginner and will focus on creating a new wallet. In case you already had an existing wallet, you’ll need your seed phrase (12 random words you were provided with at the wallet’s creation) to import it.
To create a new wallet, click “Get Started” and choose “Create a Wallet”. Agree to the terms and create a password to protect access to your wallet on the current device.
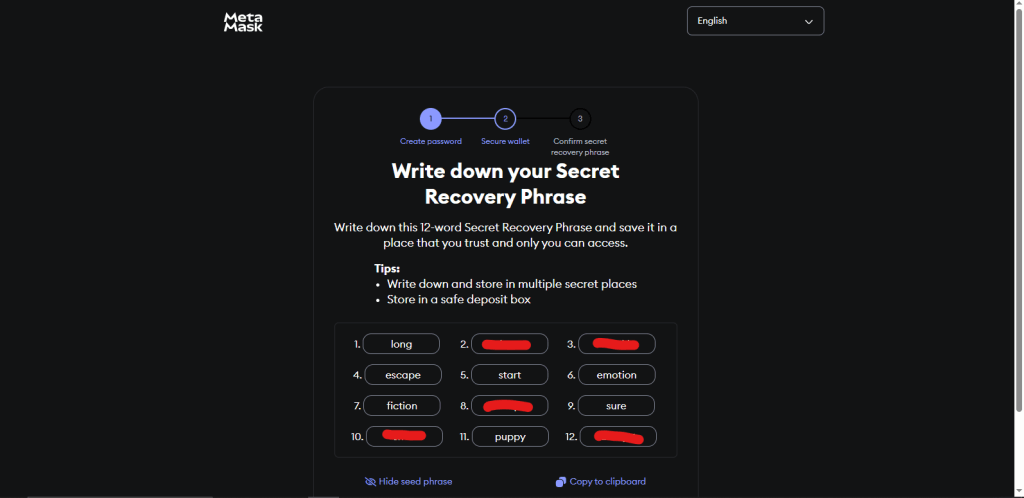
MetaMask should provide you with a Secret Recovery Phrase, or a group of 12 words, which will act as your wallet’s master key and will help you to recover your assets at any time. Remember to write these words down somewhere and store them offline in a secret location.
Never share this phrase with anyone, as it grants full access to your funds. Confirm your phrase by entering the words in the correct order, and voila! You are now ready to use MetaMask. Your wallet will initially show a balance of zero ETH until you send some crypto in.
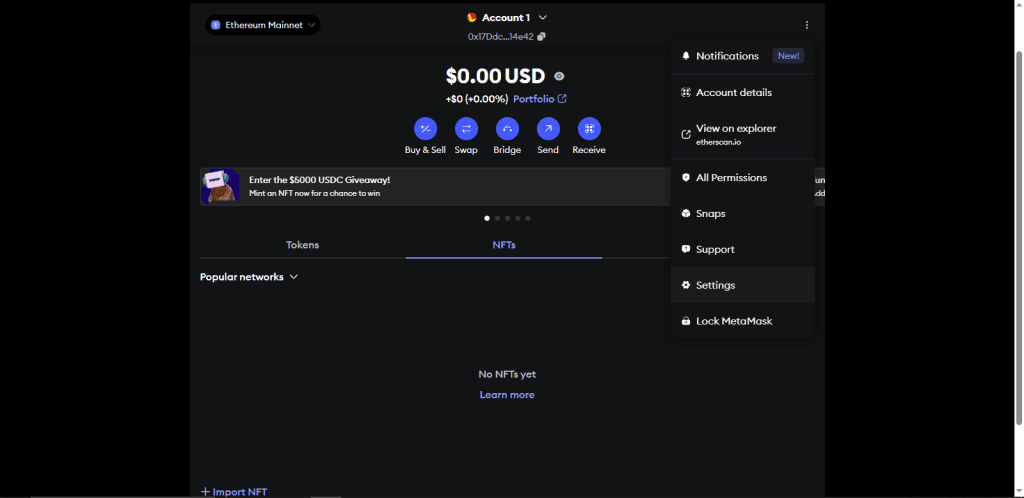
Step 3: Understanding the MetaMask Interface
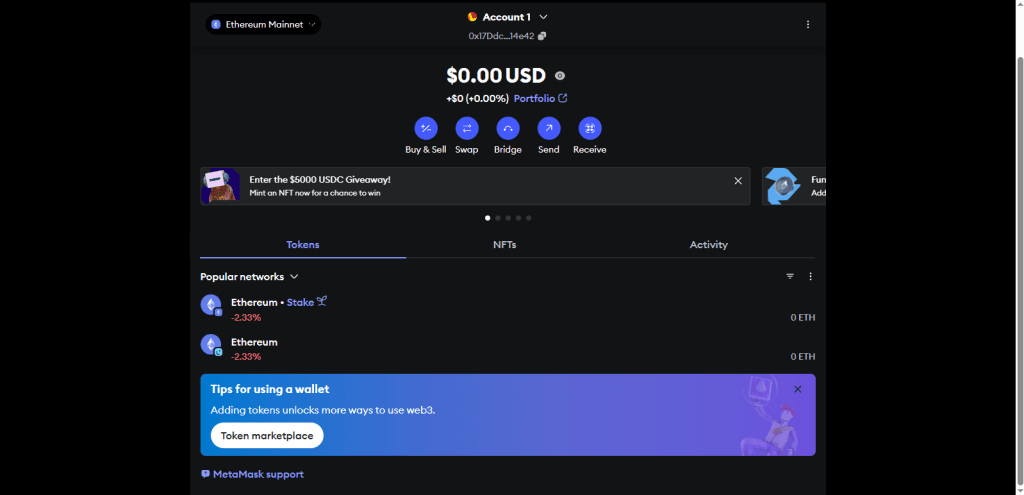
Before using MetaMask for DeFi, it is important to understand the layout of the application. For network selection, check the top of the app to switch between supported networks like Ethereum, Polygon, and Binance Smart Chain. Always make sure that you’re on the correct network for the dApp you’re using.
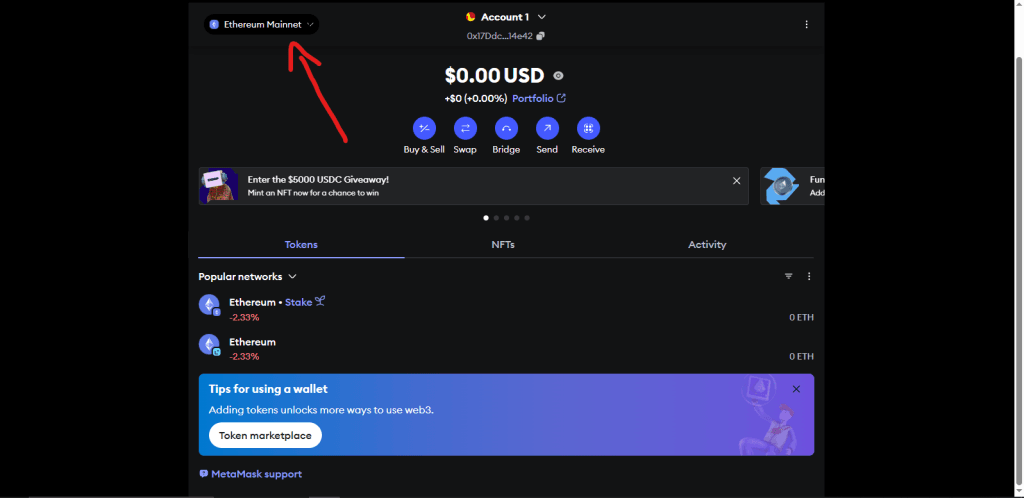
The balance display shows your holdings in ETH, or the native token of whichever network you’re choosing to transact on. The action buttons underneath your balance show the send, buy, swap, and bridge buttons, which allow you to perform their labelled transactions as illustrated.

Underneath this, the activity tab shows your transaction history, alongside the assets tab, which lists all your cryptocurrencies and NFTs.
Step 4: Connecting MetaMask to DeFi Platforms
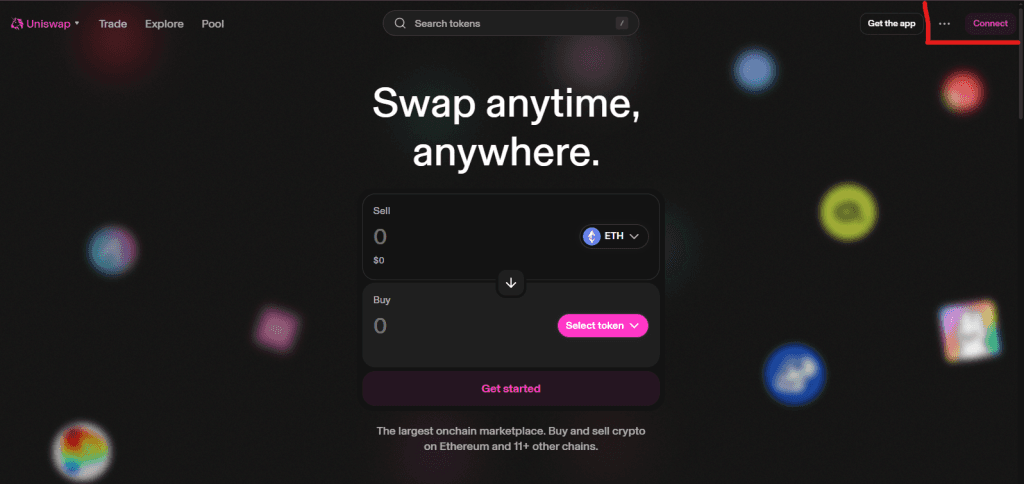
Next up, you need a way to interact with DeFi applications like Uniswap, Aave, or Compound to swap or trade your assets. To do this, fund your wallet with any amount of ETH and visit any of these sites (depending on your end goals). Assume you would like to buy some crypto, and would like to do so through an Ethereum-based decentralized exchange like Uniswap (as an example). Visit Uniswap at https://app.uniswap.org/ and click “Connect Wallet”.
Follow the instructions and choose MetaMask (be sure to approve the connection in the MetaMask pop-up, as the dApp will request permission to view your wallet).
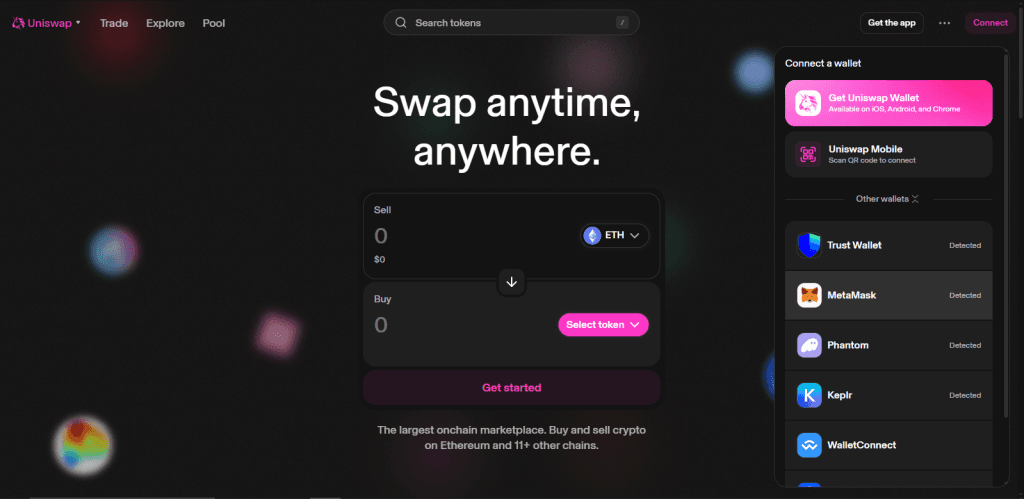
Once connected, your wallet address will appear on the site, and you can go ahead to explore further.
Step 5: Making Your First DeFi Transactions
Now that you are connected to Uniswap, now is time to perform a simple task, like swapping your first token. Right on the Uniswap homepage, you will find a set of input fields with “swap,” “limit,” “send,” and ‘buy” tabs. Stay on the “swap” tab and enter the amount of ETH you would like to swap for, say, Polygon’s $POL as an example.
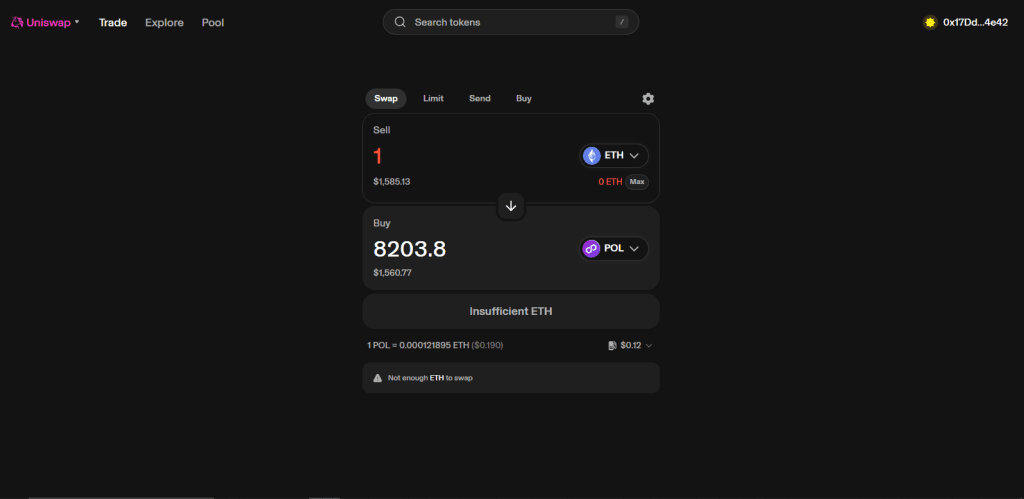
As shown, 1 ETH can purchase 8,203.8 $POL. If you are satisfied with this exchange rate, go ahead and click on “swap” to approve the transaction on MetaMask. Pay the gas fee, wait for confirmation (this usually takes a few seconds to minutes), and check your wallet for your newly-bought tokens.
Security Best Practices
Buying or swapping crypto is the easy part. The hard part is keeping your funds safe, as DeFi comes with its own set of risks. To protect yourself in this notorious financial “wild west”, remember the following. For starters, protect your secret recovery phrase, store it offline, and never share it with anyone else.
Secondly, only visit trusted websites, double-check all URLs/wallet addresses, and bookmark official dApp pages. Before clicking “confirm” on any transaction, make sure to check the recipient address, transaction amount, and gas fee. Remember to disconnect your MetaMask from dApps you no longer use. To do this, check the “Connected Sites” section under the “settings” section of your wallet’s homepage.
Finally, if you’re handling large amounts of crypto, be sure to connect a hardware wallet like Ledger or Trezor to MetaMask for extra security.
Going Beyond the Basics
As soon as you have mastered the basics of using MetaMask, you should understand that there is a whole new world of DeFi waiting to be explored. You can perform other tasks like Yield Farming, where you get to earn rewards by providing liquidity and staking LP tokens.
You can stake (or lock up your crypto to help secure a network and earn passive income. You can even use MetaMask to buy, sell, and mint NFTs, alongside cross-chain bridging, where you move assets between different blockchains. Each of these areas requires a little bit more experience and research to pull off, and MetaMask makes access simpler.
Overall, MetaMask is more than just a wallet. With this guide, you now have a solid foundation to start your DeFi journey. Remember always to start small and stay safe in the crypto space. Take the time to understand everything before committing, investment or yield farming. Happy exploring!


